03
-
Masonry
- Objectives for this tab are:
- Understand the NRM2 rules for the measurement of masonry.
- Appreciate the scope of NRM2 Section 14 Masonry.
- Apply NRM2 rules to practical masonry examples.
- This chapter will introduce the measurement of masonry items included in Work section 14 of NRM2 🔗 pages 164 - 168
- What is masonry?
- As with all NRM2 work sections, masonry lists mandatory information that must be included in descriptions, see Week 1 Tab 1.4.
Information such as;- the kind and size of the bricks 🔗 (p 1 - 6)
- the bond of the brickwork 🔗 (p 29 - 34)
- the type of pointing 🔗 (p 9 and 15 - 16)
- These items are important as they have a major impact on the pricing of masonry items.
- Masonry has a long list of deemed included items and these should be noted.
- Curved work has to be described and kept separate.
- Walling is measured on the centre line therefore, it’s a good idea to revise this technique (Week 1, Tab 1.4) before proceeding with the practical examples later in this chapter.
- Activities
- 1. Revise the technique for calculating centre lines / mean girths as discussed in week one.
- 2. What information should be available to the surveyor prior to the commencement of measuring masonry when using NRM2?
- 3. An air brick with a cross-sectional area of 0.50m2 is specified to be built into a one brick wall. Is it necessary to deduct 0.50m2 from the main area of brickwork?
- 4. What is the purpose of the Notes, comments and glossary column in NRM2?
-
NRM2 and Masonry Section 14
- Objectives for this tab are to:
- Understand the requirements of NRM2 when measuring 🔗 masonry.
- Become familiar with the various types of masonry 🔗 (Bricklaying document).
- Apply NRM2 rules to practical examples.
- Classifying masonry
- Apart from half brick skins in hollow walls, brickwork generally comes in three forms;
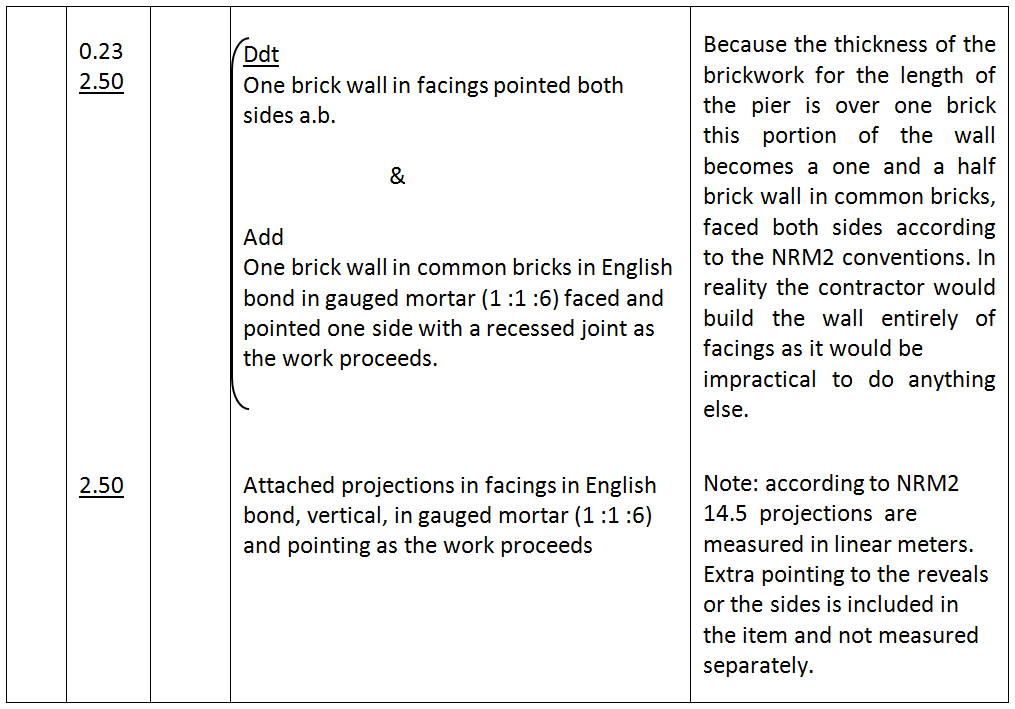
- Common brickwork, where the wall of whatever thickness is built entirely of common brickwork. The brickwork will have an ‘as built’ finish and will be used where the appearance of the finished work is unimportant.
- Common brickwork with facework one side, this can be used in any situation where the brickwork thicknesses is of one brick and over is built with an ‘as built’ finish on one face, whereas the other face can be built with a more expensive facing brick with pointing. For example;
23.00
2.90One brick wall in common bricks, English bond in gauged mortar (1:1:6) facework and pointed one side in Rustic facings with recessed joint as the work proceeds. - Brick facework both sides (entirely facings), where both sides of the brickwork are finished fair with facings or a fair face and pointing. It is therefore possible to have a two brick thick wall, built from common bricks with facings both sides.
23.00
2.90Two brick wall in common bricks, flemish bond in gauged mortar (1 :1 :6) facework and pointed both sides in Rustic Facings with recessed joint as the work proceeds. - Projections
- Brick walls are often built with piers (attached projections) beyond the face of the wall as a means of adding structural stability. These projections are bonded into the main brick wall.
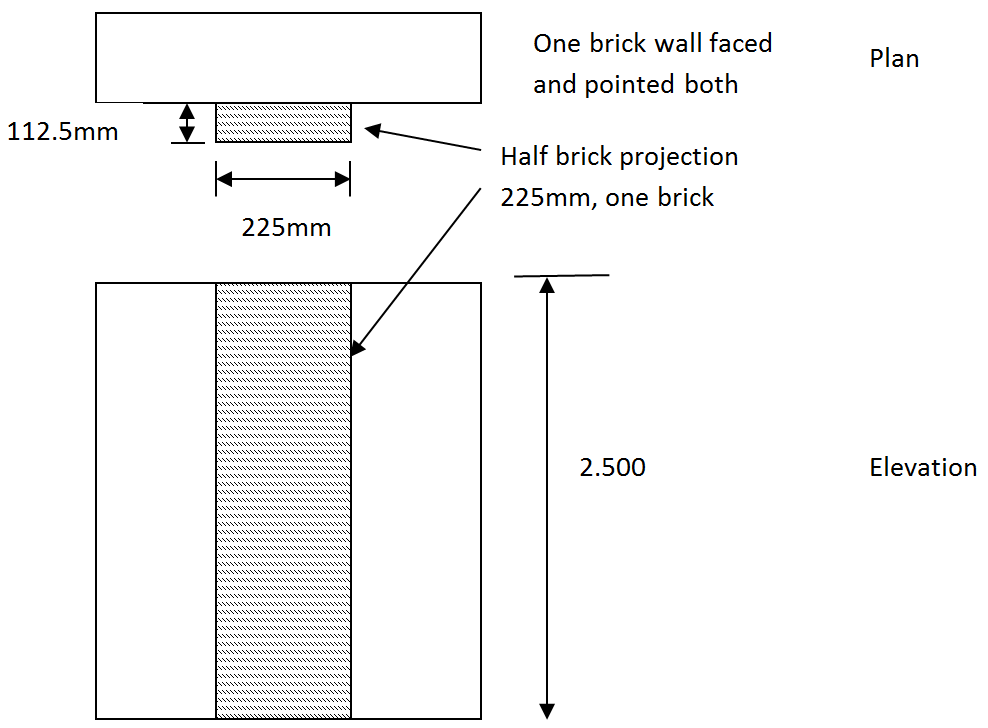
- Isolated piers
- According to NRM2 a wall becomes an isolated pier when the length on plan is less than four times its thickness. Conversely when the length on plan exceeds four times the thickness then the classification is wall. For example;
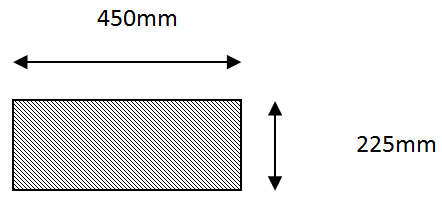
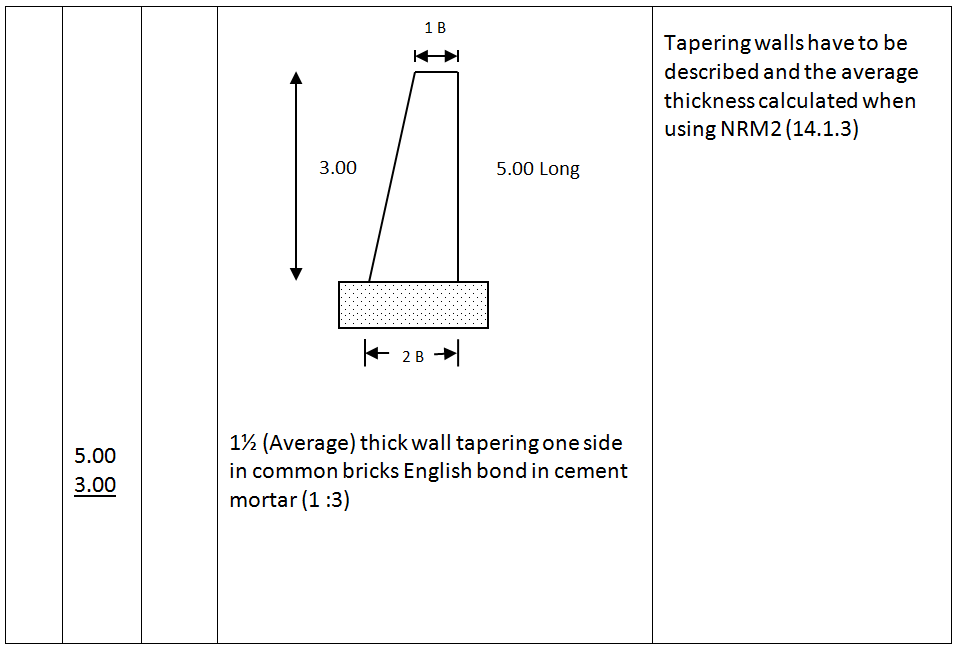
2.50 450 x 225mm Isolated pier, vertical in common bricks laid English bond in gauged mortar ab Isolated piers are measured in linear meters in NRM2 (14.4) - Tapering walls
- Extra over
- Extra over is a term used throughout NRM2 but for some reason the RICS has chosen not to define what this term means. If an item is described as 🔗 extra over, or EO, it means that this item is in addition to items that have been previously measured.
- Items 14.11 and 12 states that certain items have to be measured as extra over, these items are in addition to masonry that has been measured elsewhere, for example;
13.80 Extra over one brick wall in common bricks as before for eaves closing with blockwork - Damp proof courses, forming cavities and cavity insulation
- See NRM 2 clause nos. 14.14, 14.15 and 14.16 – 18
- Figure 3.1 illustrates a cavity wall with a damp proof course being laid onto two skins of a cavity wall. Note the laps. Damp proof courses are measured either in m or m2 depending on the width.
An item has to be measured for forming the cavity between the two skins also (14.14)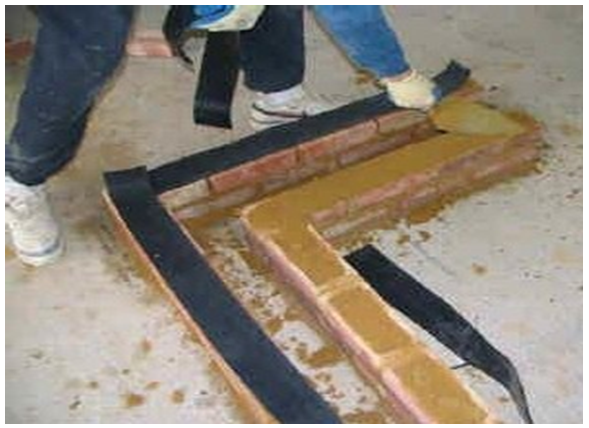
Figure 3.1 - This image shows the cavity insulation held in place with wall ties and plastic buttons.
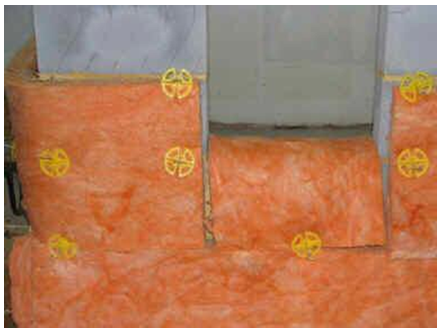
Figure 3.2 - Cavity trays, either pre-formed or, as illustrated here, made in-situ allows any condensation in the cavity to be collected and released from the through weep-holes left in the brickwork.

Figure 3.3 - When measuring masonry, it is measured gross, that’s to say over all door, window and other openings, as if they didn’t exist. Adjustments will be made later on for this over-measure (See Week 8).
- Therefore, in the first instance when measuring the brickwork for the house shown in Fig 3.4, the masonry would be measured as if the windows and doors were not there.
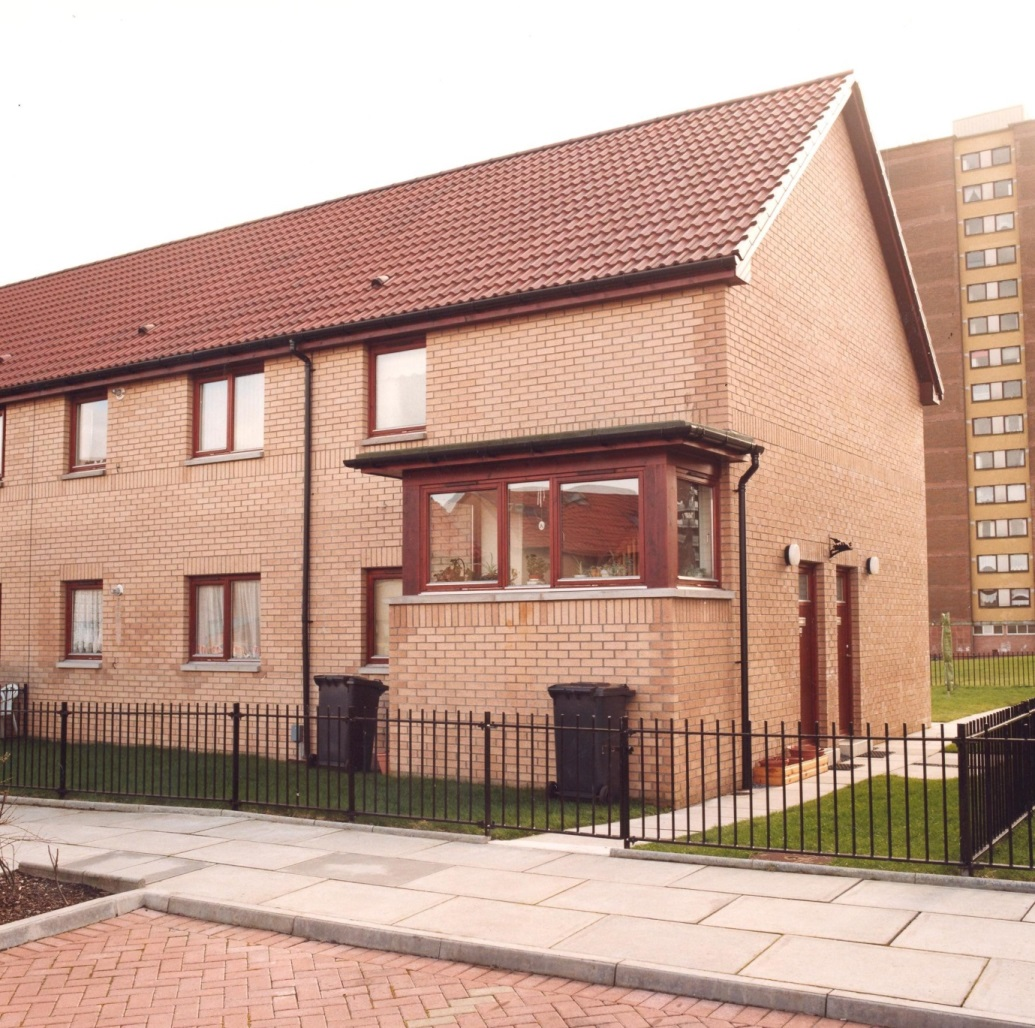
Figure 3.4 - Note the horizontal brickwork under and above the windows
- These are known as ‘Bands’ and are measured in accordance with NRM2 Cl. 14.7
- Activities
- 1. How are special purpose blocks or stones measured?
- 2. Identify the point at which, for measurement purposes, an attached projection becomes a wall.
- 3. List the items that should be included in a description of a one brick wall when using NRM2.
- 4. Where are cavity trays used?
- 5. What information should be given in the description of a damp-proof course?
- 6. Describe what is meant by the term ‘Wedging and pinning.’
-
Examples
- Objectives for this tab are to:
- Understand how to measure a simple masonry example
- To recognise attached projections
- Measurement 1 example
- Look at the plan of a simple building 🔗 Measurement example 1
- It’s mainly built from a one brick wall but has a couple of features (A & B) where the wall is thicker.
- The surveyor has to consider whether these features are classified as walls or attached projections – see 🔗 NRM2 Cl. 14.5.1.1.1
- What is an attached projection?
- A feature is classified as an attached projection and not a wall when the length on plan does not exceed four times its projection. Therefore;
- A is an attached projection and
- B is a wall two bricks thick
- and will be measured accordingly.
- Isolated piers
- 🔗 Measurement example 1 shows an isolated pier, feature C
- Isolated piers are measured in linear metres (their height) in accordance with 🔗 NRM2 Cl. 14.4.1.1.1
- Once again a wall becomes and isolated pier when the length on plan does not exceed four times its thickness.
- Model solution
- We will now go through the 🔗 model answer for measurement 1 example.
- The first task is to calculate the mean girth
- The dimensions and the 🔗 accompanying description can now be entered onto the dimension paper.
- Now let’s turn our attention for features A & B
- As shown in column 1 and 2 of the model answer adjustment has been made for the attached pier and the length of two brick thick wall.
- Isolated piers ( C ) follow a similar rule and therefore this feature is measured in linear metres as an isolated pier ( NRM 2 Cl. 14.4 )
- Finally the damp-proof course is measured keeping items over 300mm wide separate from items no exceeding 300mm wide.
- Activities
- 1. Using the drawing, measurement example 1, work through the model answer making a note of which NRM2 clauses have been used to produce the descriptions.
-
Example 2
- Objectives for this tab are to:
- Understand how to measure a simple masonry example
- To recognise and describe attached projections
- Generally
- Before commencing measurement it is a good idea to draw-up a taking-off list
- This list acts as an aide memoire and is good practice, especially for the inexperienced taker-off, for example in the case of masonry example 2 this work be;
- 1. One brick wall
- 2. Two brick wall
- 3. Attached projection
- 4. Two brick wall
- 5. Adjustment for items 3 & 4.
- Tick off the items as you measure them.
- Activities
- Measurement 2 example
- 1. Now let’s look at 🔗 masonry example 2
- 2. It’s very similar to masonry example 1, however in this example there are no damp-proof courses to measure. It would be a good idea to include the apparent lack of damp proof courses on a 📹 query list to make sure none are required.
- 3. Refer to the 🔗 model answer and work your way through the 🔊 example
X -
Learning Outcomes
- On completion of this week you should be able to;
- 1. Understand the term ‘extra over’.
2. Recognise the various classification of masonry.
3. Compose a description for simple masonry items.
4. Define the term; ‘attached projection.’
5. Recognise an isolated pier.
6. Apply the technique of calculating a mean girth to masonry.
7. Appreciate the items that need to be included when measuring a cavity wall.
- Insert Content Here
- Insert Content Here